Back in Windows 8 Microsoft modified the look and feel of the File Explorer with new icons, new features, ribbon menu, etc. In fact, they even changed the name from Windows Explorer to File Explorer, which makes a lot of sense. Obviously, there are some who don’t like the new File Explorer style. If you really like the Windows 7 style File Explorer or just hate the ribbon menu in the new File Explorer, you can easily modify the look and feel of the File Explorer to mimic the Windows 7 style. Here is how you can do that.
Make File Explorer Look Like Windows 7 File Explorer
Note: we are going to use a third-party software to modify the file explorer. Before making any changes, make sure that you back up your system. This helps you to revert back if anything bad happens.
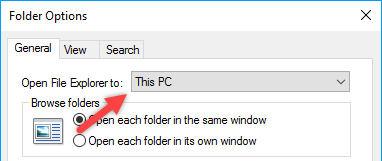
To start, we need to change the default File Explorer view from “Quick Access” to “This PC.” To do that open the File Explorer by pressing the keyboard shortcut “Win + E.” Select the “View” option, and then click on “Options” appearing on the ribbon menu.

In the Options window select the option “This PC” from the drop-down menu next to “Open File Explorer to.”
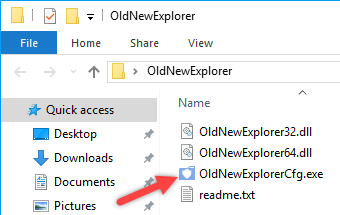
Once you are done with thi go ahead and download OldNewExplorer. Extract the contents onto your desktop and execute the file “OldNewExplorerCfg.exe.”
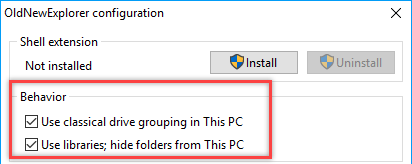
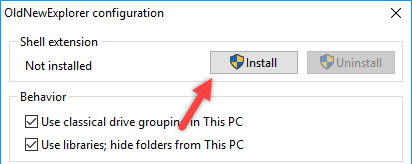
After opening the OldNewExplorer, select both checkboxes under the “Behaviour” category. The first option brings back the Windows 7-style drive grouping so that you no longer see your external or USB drives next to your hard drives, rather they will appear in a separate section.
The second option uses the Libraries, just like in Windows 7, and removes the “Folders” section from the File Explorer.
Under the Appearance section, select all the checkboxes. These options will alter the File Explorer to match the Windows 7 style. You can also select the appearance style and status bar style using the drop-down menu next to them. However, it is recommended that you leave it with the defaults.
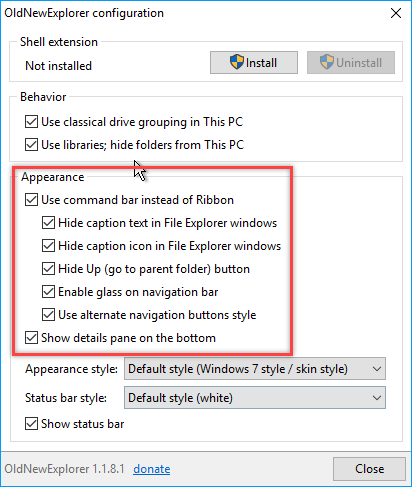
Once you are done with everything, click on the “Install” button appearing on the top of the window.
This action installs and modifies all the necessary registry entries. Once this is done, you will have your Windows 7-style File Explorer. If you want to you can also remove the Quick Access menu from the left sidebar.
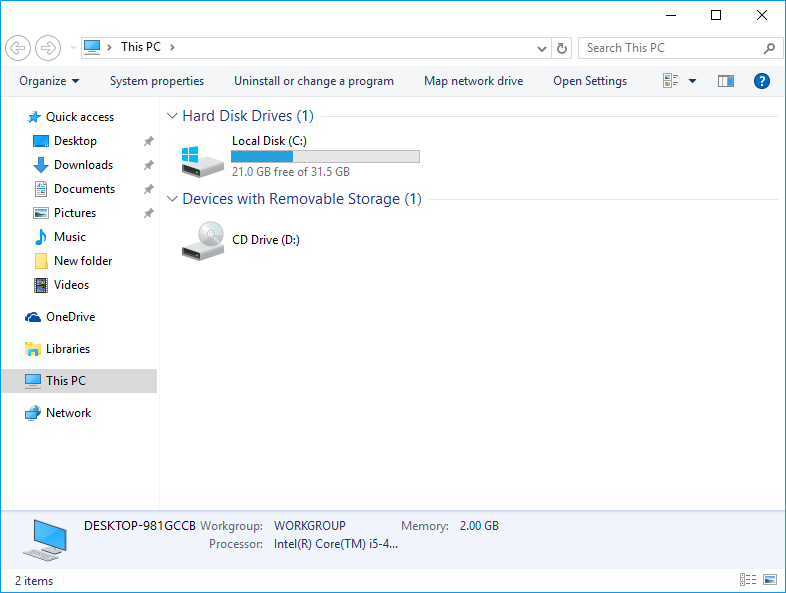
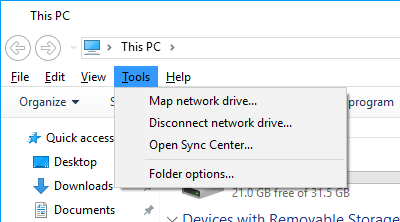
Just like in Windows 7 you will have your classic navigation menu at the top of the window.
If you ever want to revert back, simply open the OldNewExplorer app, and click on the “Uninstall” button. This action will undo all the changes.
Do comment below sharing your thoughts and experiences about using the above application to make Windows 10 File Explorer look like Windows 7 File Explorer.
Also read: How to Make Windows 10 Look Like Windows 7

Vamsi is a tech and WordPress geek who enjoys writing how-to guides and messing with his computer and software in general. When not writing for MTE, he writes for he shares tips, tricks, and lifehacks on his own blog Stugon.
Subscribe to our newsletter!
Our latest tutorials delivered straight to your inbox
Sign up for all newsletters.
By signing up, you agree to our Privacy Policy and European users agree to the data transfer policy. We will not share your data and you can unsubscribe at any time. Subscribe