All 1.2 billion Microsoft Office users have probably benefited from Word’s Protected View format. When you download documents or format them to Word from the Internet, especially from cloud services (like OneDrive, Google Drive, Dropbox, and Box) or as email attachments, you’ll get the document in “Protected View.”
Protected View is Microsoft’s way of protecting your computer from harm while giving you access to the document you downloaded. Giving reasons for setting documents to Protected View, Microsoft’s website reads:
Files from the Internet and from other potentially unsafe locations can contain viruses, worms, or other kinds of malware that can harm your computer. To help protect your computer, files from these potentially unsafe locations are opened in Protected View. By using Protected View, you can read a file and see its contents while reducing the risks.
However, Word isn’t locked to the Protected View format. Switching from Protected View to editing mode takes only a few clicks. You’ll notice a yellow Message Bar. Click “Enable Editing” as you’d see on the Message Bar. Next, click File and then Edit Anyway. You can also skip Protect View altogether and go straight to editing mode whenever you download Word-formatted documents from the Internet.
How to Disable Protected View in Word
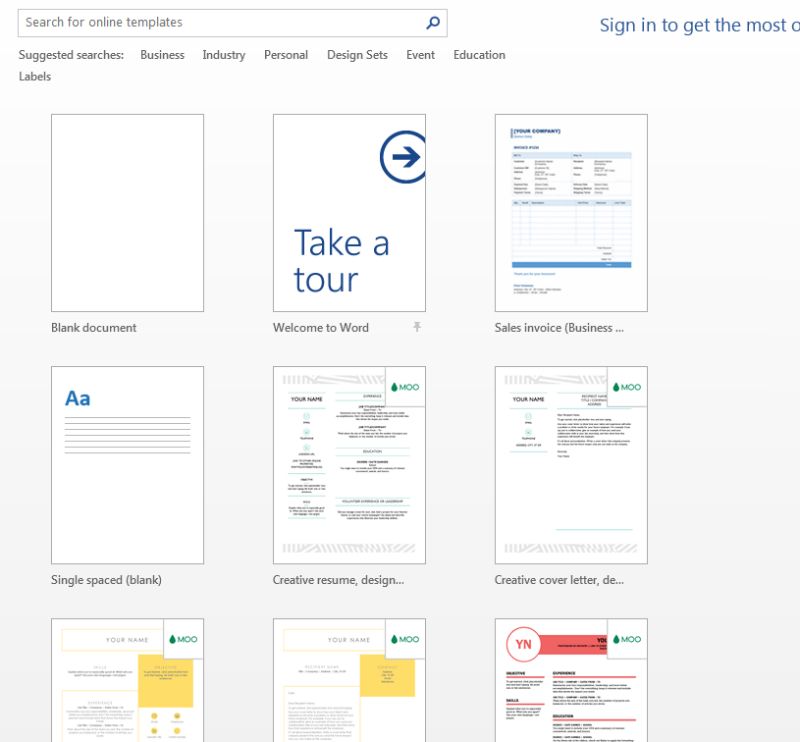
The obvious first step is to open your Microsoft Word to see the display as shown in the image below. Unless you’re using older versions of Word, this is what you should see when you open the software.
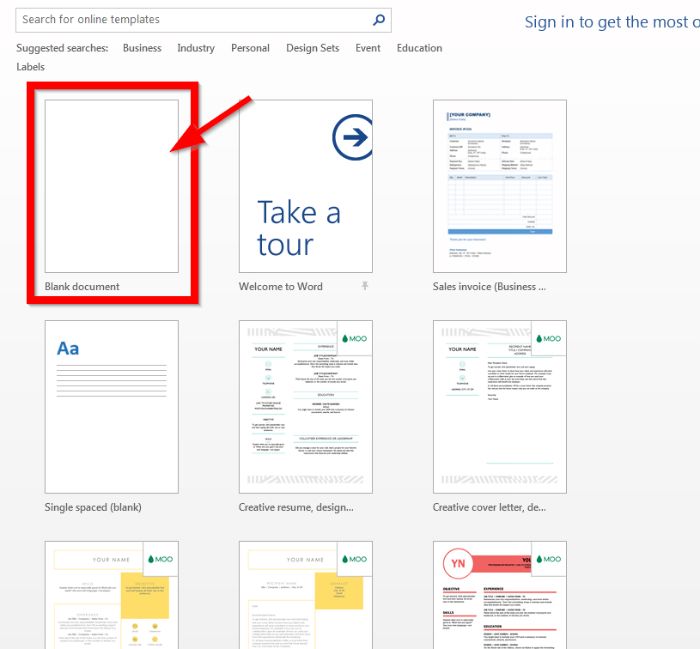
Now, choose a blank document. This should be the blank document on the top-left side of your desktop as seen in the red box and arrow below.
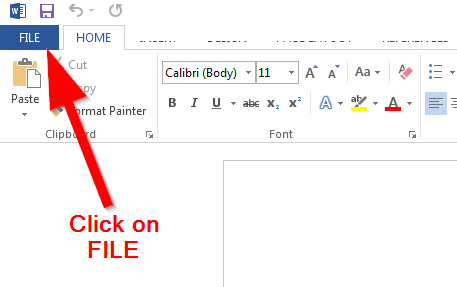
Next, click on the ‘File’ tab. You’ll see this tab on your blank file just as indicated by the red arrow below.
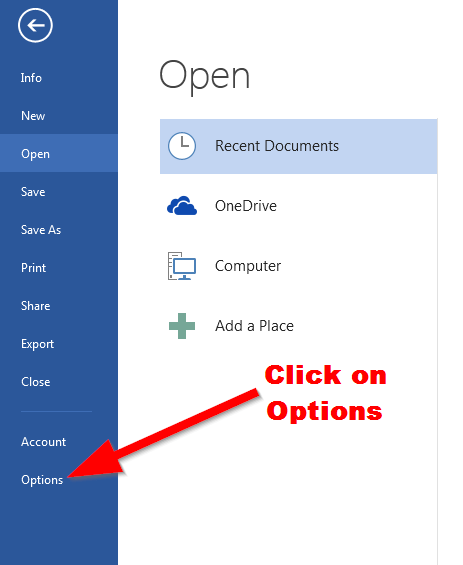
Click on Options. This is the last link to the bottom-left side of your screen as indicated by the arrow below.
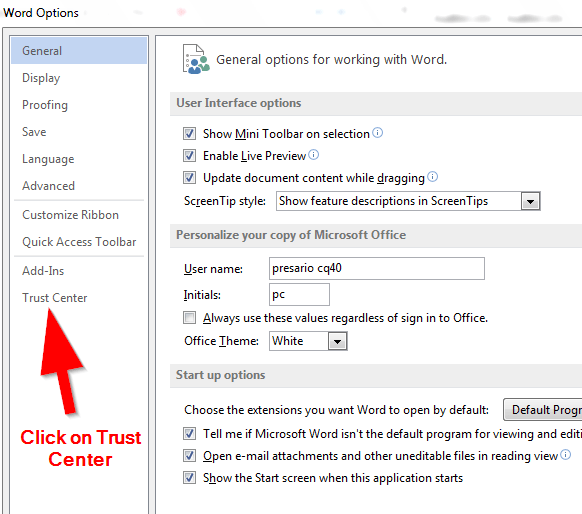
Once you click on Options (from the step before this one), you’re taken to Word Options where you can access the Trust Center. The last link on the bottom-left side of your screen is labeled “Trust Center” as indicated by the arrow below.
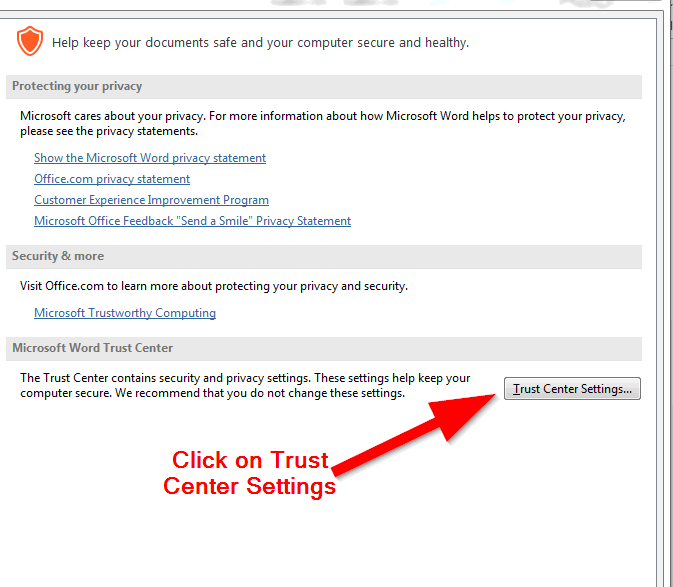
Now, look at the bottom-right side of Trust Center to find a button labeled “Trust Center Settings.” Click on that button as indicated by the arrow below.
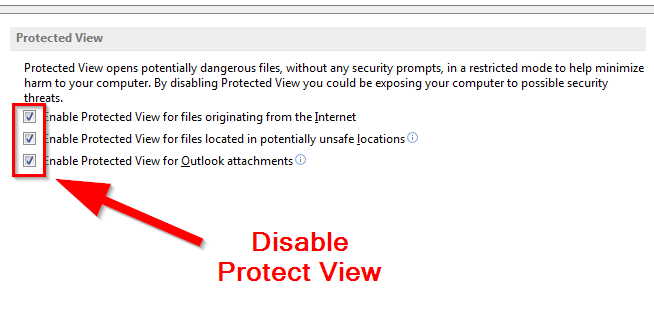
Next, select “Protected view” which is the fifth link from the bottom on the left side of your screen.

Depending on your preferences, you may choose one of three types of Protected Views or a combination of them. Protected View may be set for:
- Files with origins from the Internet (like your cloud storage, downloads from websites and others). This is basically all your files.
- Files that are located in places that might be unsafe, a public domain or an online public repository.
- Your desktop email client, e.g. Outlook.
Conclusion
With your Protected View disabled, you can easily download and instantly start editing documents from the Internet, emails, cloud, and others. Just as Microsoft indicates on their website, Protect View is a security feature to protect you from harm’s way. Unless you’re always sure that the documents you download are safe, it’s best to leave your Word’s Protected View on.

Nicholas Godwin is a technology researcher who helps businesses tell profitable brand stories that their audiences love. He’s worked on projects for Fortune 500 companies, global tech corporations and top consulting firms, from Bloomberg Beta, Accenture, PwC, and Deloitte to HP, Shell, and AT&T. You may follow his work on Twitter or simply say hello. His website is Tech Write Researcher.
Subscribe to our newsletter!
Our latest tutorials delivered straight to your inbox
Sign up for all newsletters.
By signing up, you agree to our Privacy Policy and European users agree to the data transfer policy. We will not share your data and you can unsubscribe at any time. Subscribe