
Microsoft made it possible to use Cortana on the lock screen so that you can do a variety of things like getting weather updates, reminders, calendar events, traffic data, playing songs, etc., without unlocking the PC first. For sensitive tasks like launching applications or accessing sensitive data, you are required to unlock the PC first.
As good as it is, if you are not using or simply don’t like Cortana on the lock screen, you can easily disable it as needed. Here’s how.
Also read: How to Completely Disable Cortana in Windows 10
Disable Cortana on Lock Screen from Settings App
Windows 10 has a dedicated section in the Settings app that allows you to control the permissions and behavior of Cortana. As such, you can easily disable or enable Cortana on the lock screen by toggling a single switch. The best thing about this approach is that it is user specific, i.e. the changes you make don’t affect other users on your system. They can still have Cortana enabled on their lock screen.
1. First, open the Settings app by pressing the keyboard shortcut Win + I. You can also open it by searching for it in the Start Menu. In the Settings app go to “Cortana” and then “Talk to Cortana.”
2. On the right panel, scroll down until you see the “Lock Screen” section. Toggle the switch under “Use Cortana even when my device is locked” to “Off.”
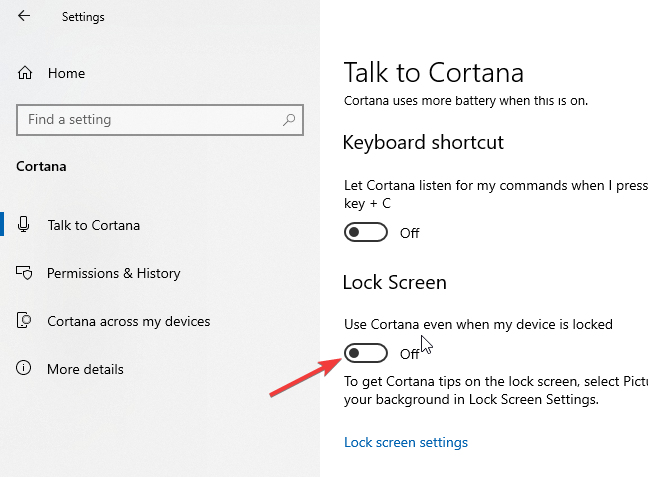
You’ve now disabled Cortana on the lock screen for your user account. If you want to enable Cortana on lock screen again, all you have to do is toggle the switch to “On.”
From Registry Editor
If you have multiple users on your system and want to disable Cortana on the lock screen for all of them, then you have to use the Registry Editor. Before editing the Registry, back it up to be safe.
1. Press Win + R, type regedit and press Enter. Now, go to the following key in the Registry Editor.
HKEY_LOCAL_MACHINESOFTWAREPoliciesMicrosoftWindows
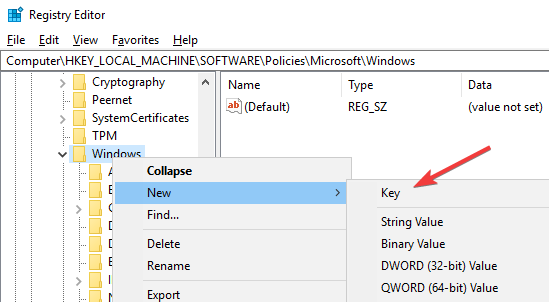
2. Under the “Windows” key, see if you have a key named “Windows Search.” If you have the key, then proceed to the next step. Otherwise, right-click on the “Windows” key, select “New -> Key” and name the key as “Windows Search.”
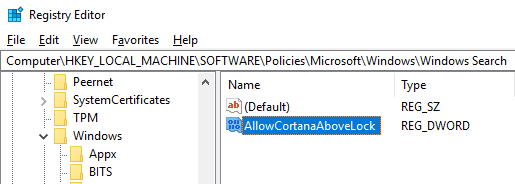
3. Select “Windows Search” key, right-click on the right panel and select “New -> DWORD (32-bit) Value.” Name the new value as “AllowCortanaAboveLock,” and press Enter to confirm.
4. Double-click on the newly created value, and set the value data as “0.” Click on the “OK” button to save changes.
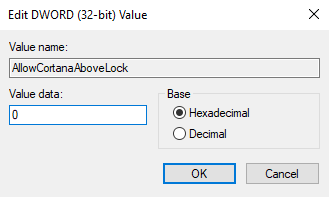
That is it. By setting the value data to “0,” you’ve disabled Cortana on the lock screen for all users on your system. In the future, if you want to enable Cortana on the lock screen, just delete the “AllowCortanaAboveLock” value, or set the value data to “1.”
Also read: How to Get Cortana to Shut Down Your PC in Windows 10
From Group Policy Editor
Windows 10 Pro users can use the Group Policy Editor to disable Cortana on the lock screen for all users of Windows 10.
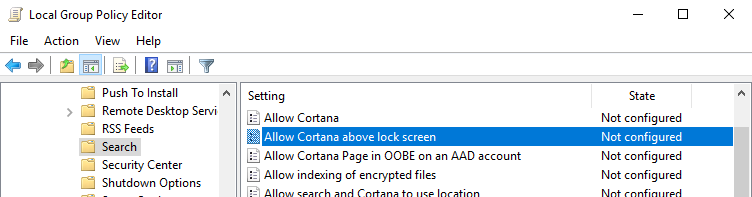
1. Press Win + R, type gpedit.msc and press Enter. In the Group Policy Editor, go to “Computer Configuration -> Administrative Templates -> Windows Components -> Search.”
2. Find and double-click on the “Allow Cortana above the lock screen” policy.
3. Select “Disabled” in the policy properties window to disable Cortana on the lock screen.
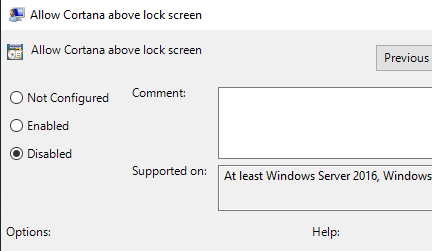
If you want to enable Cortana again, either select “Not Configured” or “Enabled.”
Comment below sharing your thoughts and experiences regarding using the above methods to disable or enable Cortana on the lock screen in Windows 10.

Vamsi is a tech and WordPress geek who enjoys writing how-to guides and messing with his computer and software in general. When not writing for MTE, he writes for he shares tips, tricks, and lifehacks on his own blog Stugon.
Subscribe to our newsletter!
Our latest tutorials delivered straight to your inbox
Sign up for all newsletters.
By signing up, you agree to our Privacy Policy and European users agree to the data transfer policy. We will not share your data and you can unsubscribe at any time. Subscribe