
Depending on how you use your Windows PC, it can get quite slow and may even get riddled with strange problems. This is especially true if you are installing and uninstalling a lot of software or when the system is infected with a virus, malware, adware, etc. In those situations the best thing to do is reset the PC.
Thankfully, Windows 10 makes it pretty easy. All you have to do is a couple of clicks in the settings app. However, unless you bought a pre-built PC from a manufacturer like Dell, HP, etc., or have the recovery partition, Windows will prompt you to insert the installation media when resetting the computer.
Though this doesn’t seem like much, it can be quite annoying if you don’t have the Windows 10 installation DVD or USB drive. To deal with this kind of situation, you can create your own reset recovery image so that you can reset the Windows computer without worrying about the installation media.
Create Reset Recovery Image
To create a reset recovery image, you need to copy a file from the Windows 10 installation media. First, make sure that the Windows 10 version you are using and version of the installation media are the same. For instance, if you are using Windows 10 Creators update then you need to have the Windows 10 Creators update ISO.
If you are not certain, then simply make sure that you are on the latest version of Windows 10. Now, download Windows 10 ISO from the Microsoft website.
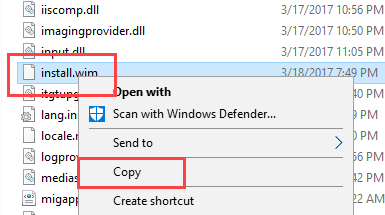
Once you have it, double-click on the ISO file. Windows will automatically mount the ISO in a virtual drive. Open the drive, navigate to the “Resources” folder, right-click on the “install.wim” file and click on the option “Copy.”
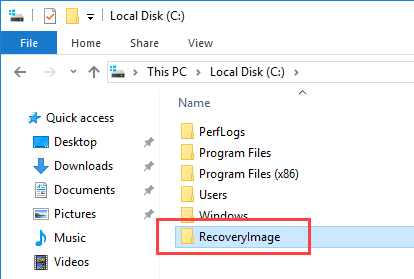
Now, open the drive or partition of your choice, create a new folder and name it “RecoveryImage.” In my case I created my folder on the C drive. Also, you can name the folder whatever you want.
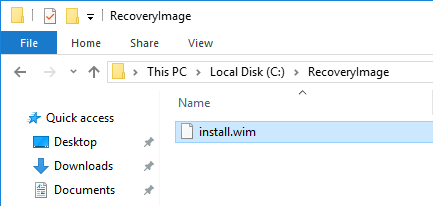
Open the newly created folder and paste the file you copied earlier using the keyboard shortcut “Ctrl + V.”
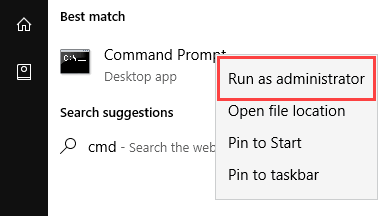
After copying the file, search for Command Prompt in the Start menu, right-click on it and select the option “Run as Administrator.”
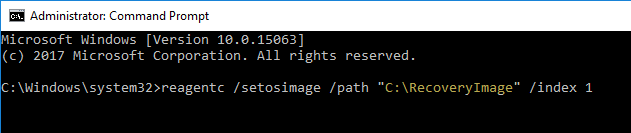
The above action will open the Command Prompt with admin rights. In the command prompt copy the below command, paste it in and press the Enter button. Don’t forget to replace the dummy path in quotes with the actual path of the folder you created earlier. In my case the actual path will be “C:RecoveryImage.”
reagentc.exe /setosimage /path "C:PathToRecoveryImageFolder" /index 1
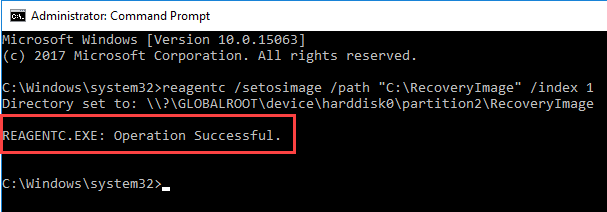
As soon as you execute the command, Windows will set the OS image and will let you know the same.
Now, just to make sure that the Windows Recovery Environment is enabled, use the command below.
reagentc.exe /enable
From this point forward, whenever you try to reset your PC, Windows will use this reset recovery image.
Do comment below sharing your thoughts and experiences about using the above method to set reset a recovery image in Windows 10.

Vamsi is a tech and WordPress geek who enjoys writing how-to guides and messing with his computer and software in general. When not writing for MTE, he writes for he shares tips, tricks, and lifehacks on his own blog Stugon.
Subscribe to our newsletter!
Our latest tutorials delivered straight to your inbox
Sign up for all newsletters.
By signing up, you agree to our Privacy Policy and European users agree to the data transfer policy. We will not share your data and you can unsubscribe at any time. Subscribe