How to Use a Mixer: A Beginner’s Guide
If you’re new to audio mixing, you may be wondering how to use a mixer effectively. An audio mixer, also known as a mixing board or soundboard, is a crucial tool for controlling the levels of multiple audio inputs, allowing you to balance the sounds of different instruments, microphones, or other audio sources.
Mixing is an essential process in both recording music and live performances, ensuring that one instrument doesn’t overpower the others. Although using a mixer may seem intimidating at first, it’s quite manageable once you understand the function of each knob and control.
In this guide, you’ll learn how to use a mixer, from connecting your instruments or microphones to adjusting the volume levels of each input to create the perfect mix. By following these steps, you’ll be able to manage your sound with confidence.
Part1 Connecting Your Equipment
How to Use a Mixer: Step-by-Step Guide
Using a mixer can be intimidating at first, but with the right steps, you’ll be able to create balanced, high-quality audio mixes. Here’s how to get started:
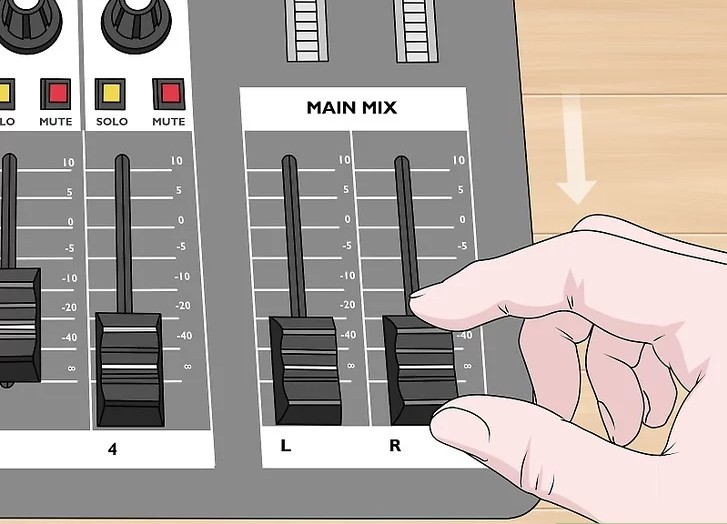
Step 1: Turn the Master Volume and Channel Faders Down
Before turning on the mixer, make sure the master volume and channel faders are turned down completely. The master volume is typically located at the bottom right side of the mixer and is labeled “Main Mix” or something similar. The channel faders are found along the bottom and control individual input volumes. Turn knobs counterclockwise or slide sliders down completely to avoid loud feedback or damage to the equipment.
- Tip: The master volume and faders are usually a different color than the other controls, so they’re easy to identify.
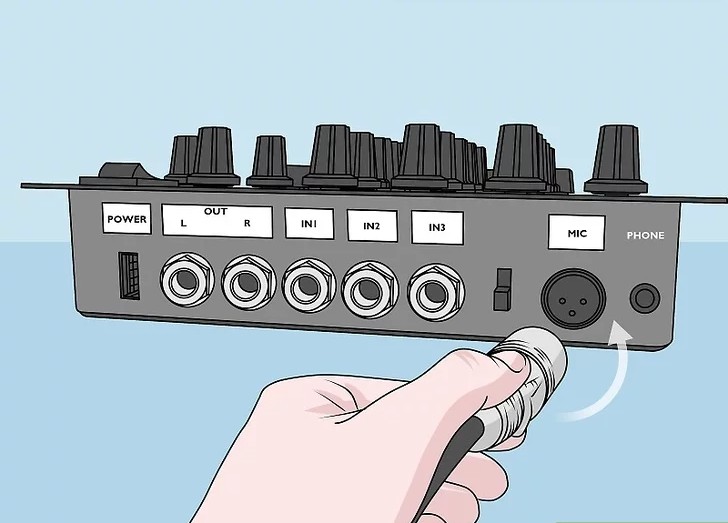
Step 2: Plug Microphones Into Channels Using XLR Cables
To connect a microphone, use an XLR cable. XLR cables have a metal cylinder with three pins inside. Insert one end into your microphone and the other into an XLR port on the mixer. Each port is labeled with a number corresponding to a channel on the mixer, which controls that input.
- Tip: The number of channels on your mixer determines how many devices you can connect.
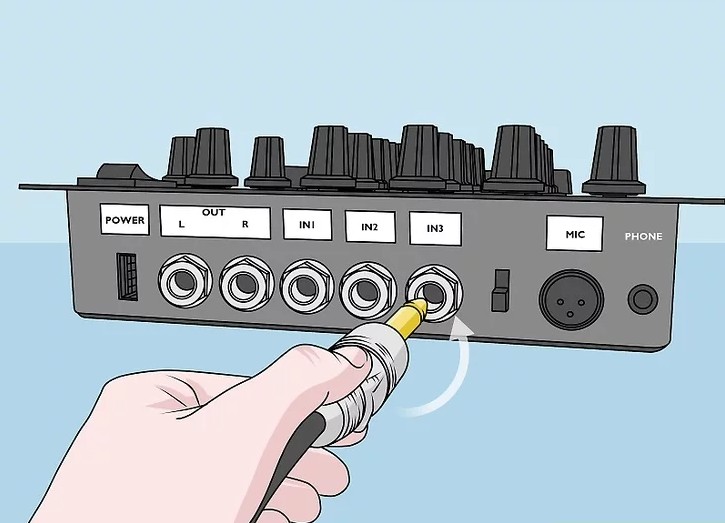
Step 3: Attach Instruments to the Line Inputs on Your Mixer
Instruments are connected to line inputs using 6.35mm audio jacks. Find the line inputs next to the XLR ports, plug the cable from your instrument into the mixer, and ensure it matches the correct channel.
- Note: Do not connect an instrument to a channel already occupied by an XLR cable.
- Tip: You can also use XLR cables for instrument connections.
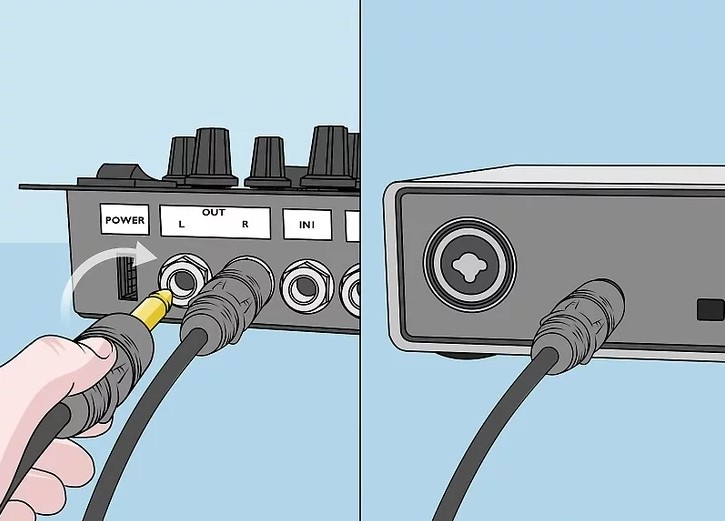
Step 4: Connect the Mixer Output to an Audio Interface with TRS Cables
To send your audio from the mixer to monitors or a computer, use TRS cables. These cables are balanced, reducing feedback and noise. Insert one cable into the “L” output and another into the “R” output, then connect them to your audio interface.
- Tip: Ensure the cable connections match the correct input and output ports for optimal sound quality.
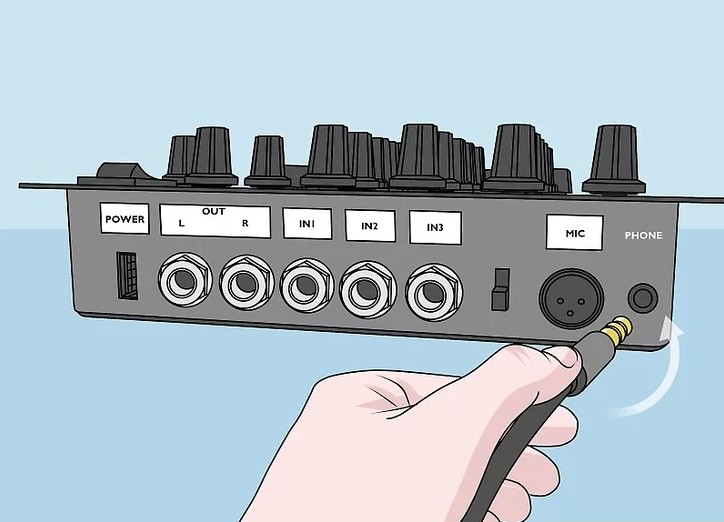
Step 5: Plug Headphones into the “Phones” Port on the Mixer
For precise audio monitoring, plug headphones into the “Phones” port using a 6.35mm jack. This allows you to hear the audio clearly and make adjustments before sending it out to speakers or recording devices.
- Tip: If your headphones use a 3.5mm jack, you’ll need an adapter to fit the mixer’s 6.35mm input.
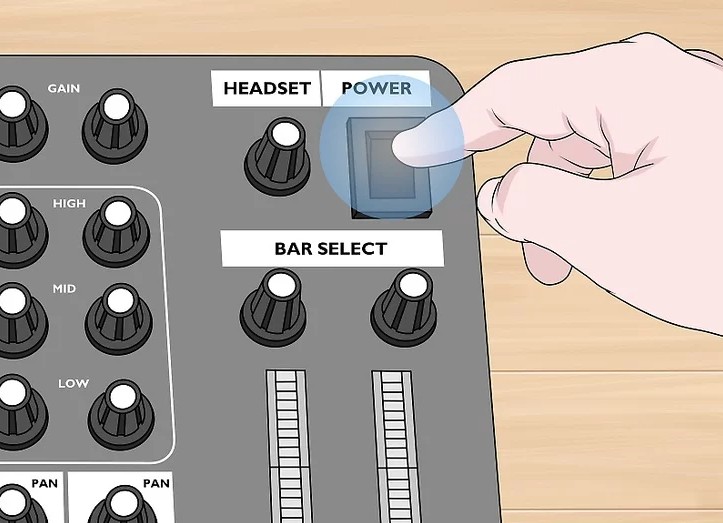
Step 6: Turn On Your Mixer Using the Power Switch
After checking that all volume and fader controls are still down, flip the power switch to turn on the mixer. This switch is usually located on the back or top right of the mixer.
- Tip: Some mixers have a phantom power switch that provides power to certain microphones. Turn this on if necessary.
By following these steps, you’ll be well on your way to mastering how to use a mixer and creating high-quality audio mixes for any project.
Part2 Adjusting the Sound Levels
How to Use a Mixer: Step-by-Step Guide
Here’s how to use a mixer to create the perfect audio balance for your performance or recording session:
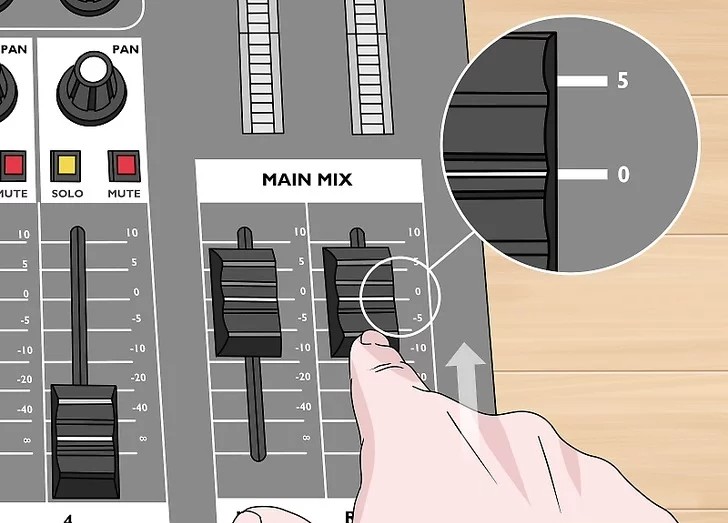
Step 1: Set the Main Volume to 0 dB
Start by setting the main volume to 0 dB. The main volume control typically has numbers printed along the side to indicate its output level. Push the slider or turn the knob until it reaches 0 dB, which is often the maximum setting. This ensures you’re getting the full range of sound without distortion. At this point, you won’t hear anything through your speakers or headphones yet because the individual channel faders are still turned down.
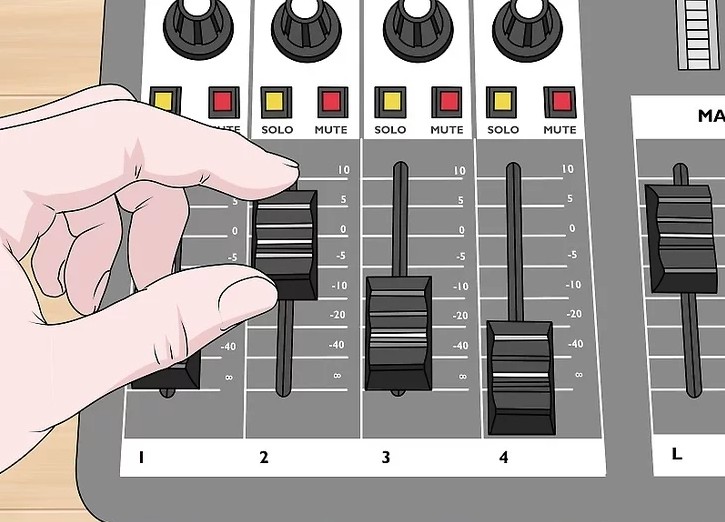
Step 2: Balance the Channel Faders
To hear all of the inputs clearly, balance the channel faders. Begin by turning up the fader for one of the channels you’re using. Gradually raise the fader for each channel that has an input attached. Test each input to make sure you can hear them through your speakers or headphones.
- Tip: Don’t raise the fader more than ¾ of the way to the maximum to avoid interference and distortion.
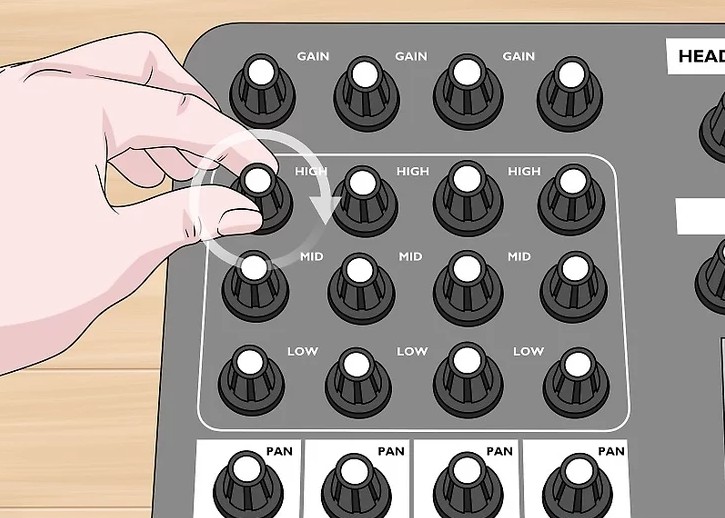
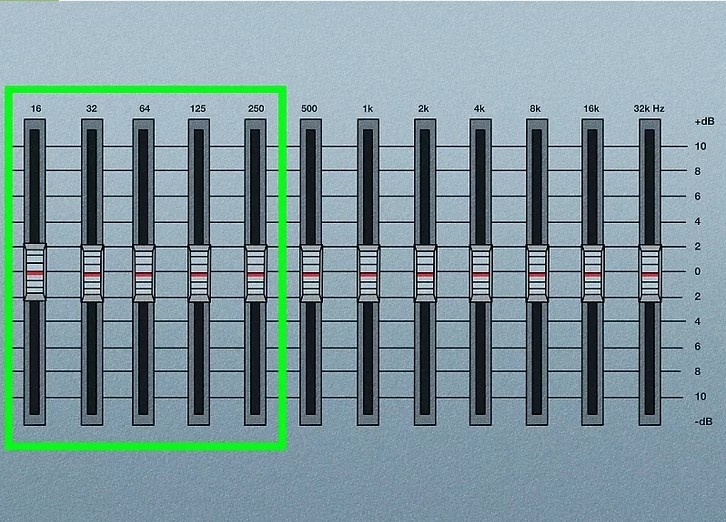
Step 3: Adjust the Treble, Mid, and Bass Frequencies
Each channel has knobs to control the treble, mid, and bass frequencies.
- The treble knob adjusts the high frequencies.
- The mid knob changes the midrange frequencies.
- The bass knob affects the lower frequencies.
Experiment with these knobs while listening to your audio input to fine-tune the sound. - Tip: For microphones, lower the bass and raise the treble to make the voice more prominent. For instruments, adjust the settings while playing to hear the changes.
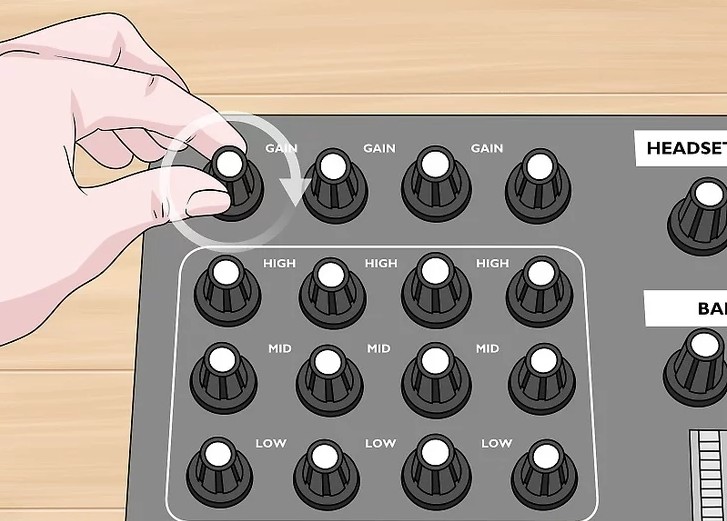
Step 4: Use the Gain Knobs to Boost Specific Channels
The gain knobs, located at the top of each channel, allow you to increase the volume of specific channels. Slowly adjust the gain for the channel you want to boost and listen to how it compares with other audio sources.
- Tip: Don’t raise the gain on every channel, as this could make the entire mix sound muffled.
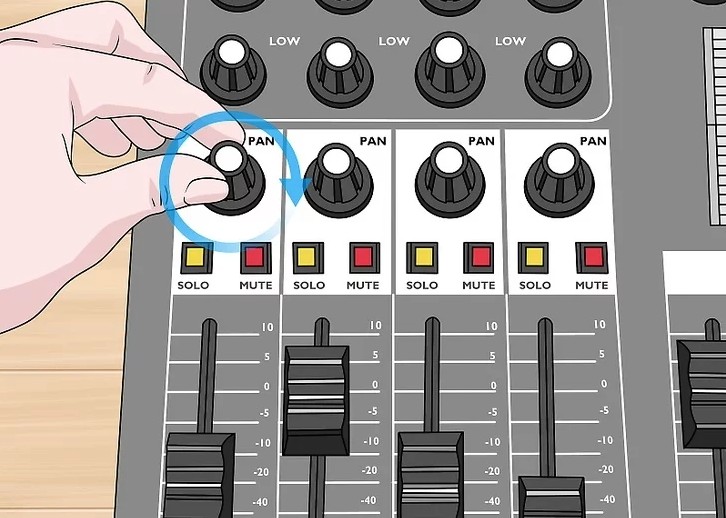
Step 5: Adjust the Pan Knobs for Left or Right Audio
The pan knobs control the balance of sound between the left and right speakers.
- Turning the pan knob to the center plays the sound equally through both speakers.
- Turn the knob left or right to make the audio more prominent in one speaker.
- Tip: If you keep all audio sources in the center, the mix may sound flat. Adjust the pan for a more dynamic sound.
By following these steps, you’ll learn how to use a mixer effectively and create a well-balanced audio mix!
Part3 Isolating and Sending Channels
How to Use Additional Mixer Functions: Mute, Solo, and Auxiliary Channels
Here are the steps to make the most out of the Mute, Solo, and Auxiliary functions on your mixer:
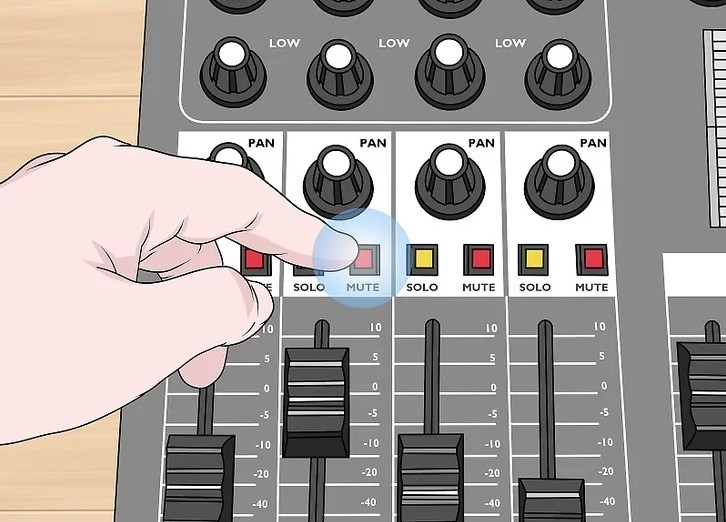
Step 1: Mute a Channel to Turn Off Its Audio
Press the “Mute” button on a channel to turn off its audio. The Mute button is usually located near the channel fader and is clearly labeled. When activated, this will stop the audio from the selected channel, while all other channels continue to play through the mixer.
- Tip: Press the Mute button again when you want the audio from that channel to play again.
- Note: Muting a channel does not stop the original input source, but it prevents you from hearing it through the speakers or headphones.
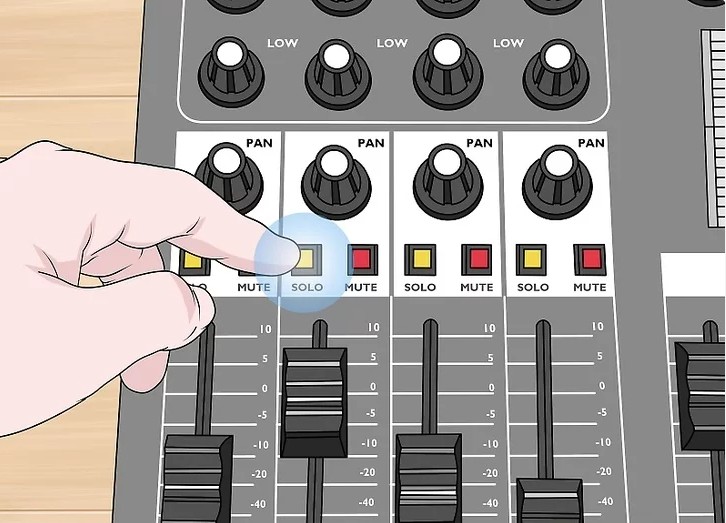
Step 2: Use the “Solo” Button to Isolate a Channel
Click the “Solo” button next to the Mute button to isolate a specific channel. Pressing Solo will mute all other channels, allowing you to hear only the selected one. This is especially useful when you need to focus on adjusting or troubleshooting a particular instrument or vocal.
- Tip: Press the Solo button a second time to unmute the other channels and return to your full mix.
- Note: You can solo multiple channels simultaneously if needed.
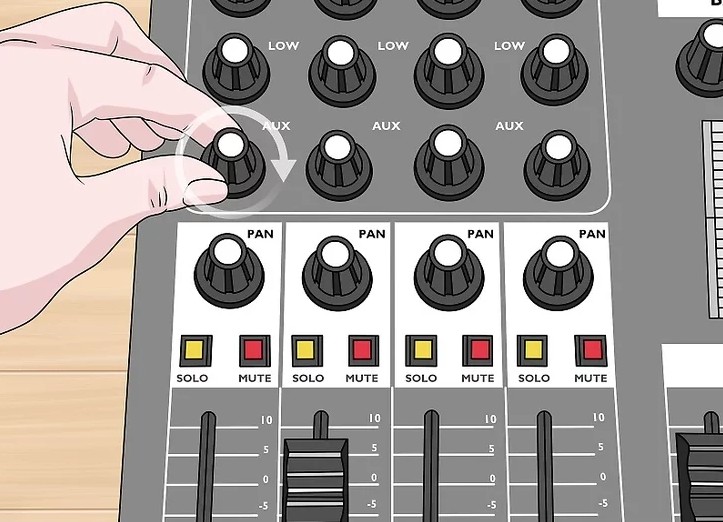
Step 3: Use the Auxiliary Channel to Send Audio to Another Source
Use an auxiliary channel to send an audio signal to a specific source, such as a monitor or effects rig. To do this:
- Plug your monitor or effects equipment into the “AUX” port on your mixer.
- Adjust the AUX knob on the relevant channel to control the volume level being sent to the auxiliary output.
- Tip: Make sure to match the AUX knob to the correct auxiliary channel your equipment is plugged into.
- Note: You can send multiple channels to the same auxiliary channel, which is useful for monitoring or applying effects.
By mastering these functions, you can fine-tune your mixer setup for more control over your audio and performance.